Learn How To Add A Image In WordPress Easily In 2024! Unleash The Power Of Divi.
Adding images in WordPress with the Divi theme is a straightforward process, allowing you to enhance the visual appeal of your website quickly. Here’s a fast guide on how to add images to your WordPress pages or posts using the Divi theme.
Table of Contents
Easy Steps On Adding A Image In WordPress
Add a Hero Image
- Log in to WordPress Dashboard: Go to your WordPress website’s dashboard by adding “/wp-admin” after your domain name and entering your credentials.
- Navigate to the Page or Post: Click on “Pages” or “Posts” from the left-hand menu, depending on whether you want to add the hero image to a page or a post. Select the page or post you want to edit.
- Enable Divi Builder: After opening the desired page or post, click on the “Enable Divi Builder” button at the top of the screen.
- Add a Section: Once in the Divi Builder, click the blue (+) button to add a new section. Choose the desired structure for your section; typically, for a hero image, a full-width section is preferable.
- Add a Row: Inside the section, click the gray (+) button to add a new row. Select the column structure you want for your hero image.
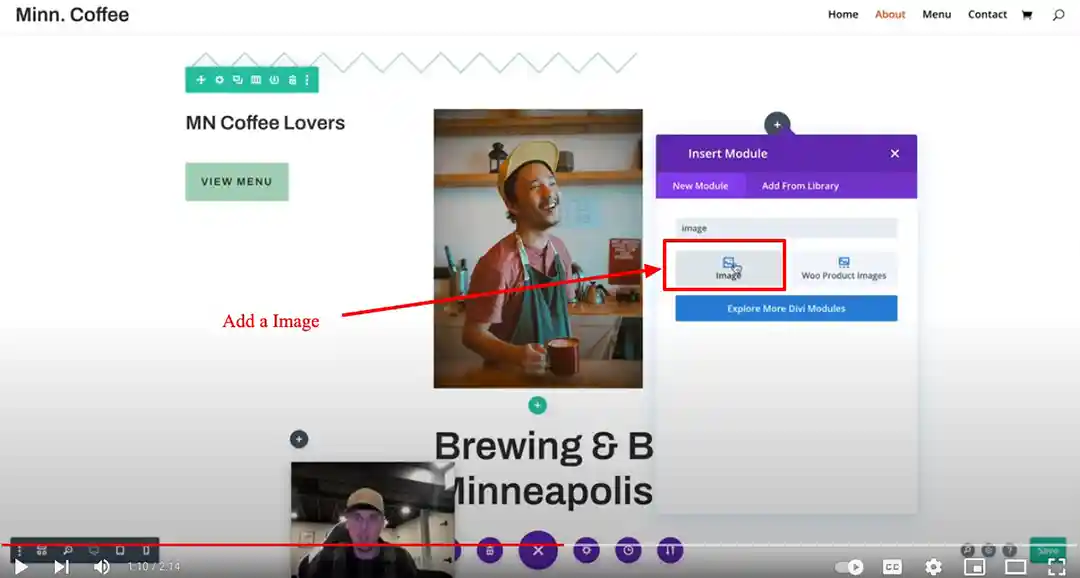
- Add a Module: Within the row, click the gray (+) button to add a module. Choose the “Image” module.
- Upload Image: In the Image module settings, click the “upload an image” button to select your hero image from your computer’s files or media library.
- Adjust Settings: Customize the image settings as per your preference, such as alignment, sizing, and link options.
- Save Changes: Once you’re satisfied with the settings, click the green checkmark button to save your changes.
- Publish or Update: Finally, click the “Publish” or “Update” button to make your changes live on your website.
Add an Image

- The process for adding a standalone image within a page or post is quite similar to adding a hero image. Simply follow steps 1 through 9 above.
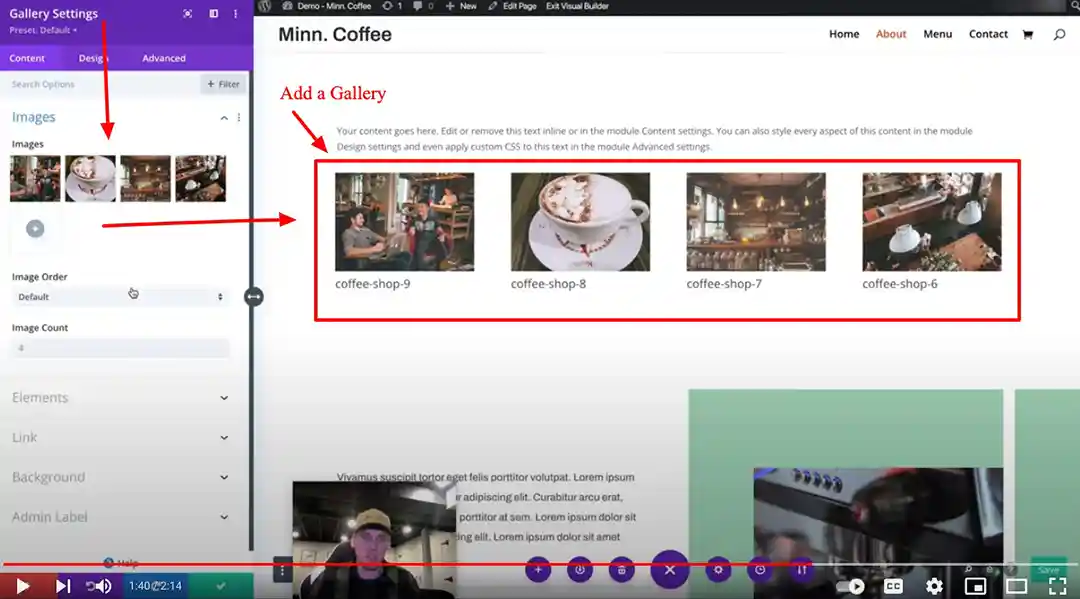
Add a Gallery
- Log in to WordPress Dashboard and navigate to the desired page or post.
- Enable Divi Builder and create a new section if needed.
- Add a Row: Inside the section, click the gray (+) button to add a new row.
- Add a Module: Within the row, click the gray (+) button to add a module. Choose the “Gallery” module.
- Upload Images: In the Gallery module settings, click the “upload images” button to select multiple images for your gallery from your computer’s files or media library.
- Customize Settings: Adjust the gallery layout, spacing, and other settings according to your preferences.
- Save Changes: Once you’re satisfied with the settings, click the green checkmark button to save your changes.
- Publish or Update: Finally, click the “Publish” or “Update” button to make your changes live on your website.
By following these steps, you can easily add hero images, standalone images, or galleries to your WordPress pages or posts using the Divi theme, enhancing the visual appeal of your website efficiently. If you need help reach out to us at Watermark Design.


0 Comments